#flutter chat app firestore
Explore tagged Tumblr posts
Visit Tumblr Blog
Explore Tumblr blogs with no restrictions, modern design and the best experience.
Last Seen Tumblr Blogs


Fun Fact
Tumblr is used by 21% of adults online aged 18-29 years.
Text
How to Choose the Right Tech Stack for Mobile App Development for iOS and Android

In today’s digital world, mobile apps are no longer a luxury-they’re a necessity. Whether you’re a startup with a disruptive idea or an established business looking to expand your digital footprint, investing in mobile app development for iOS and Android is a smart move. However, one of the most critical decisions you’ll face early on is choosing the right tech stack.
The tech stack-the combination of programming languages, frameworks, and tools used in app development-will directly impact your app’s performance, scalability, cost, and time-to-market. Selecting the wrong stack can result in a slow, buggy app or an inflated budget. On the other hand, choosing the right one sets the foundation for a smooth development process and long-term success.
In this blog, we’ll walk you through the essential factors to consider when selecting a tech stack for mobile app development for iOS and Android, and how a custom mobile app development company can guide you in making the right choices.
1. Understand the Project Requirements
Before diving into specific technologies, outline the goals and features of your app:
What’s the core functionality?
Do you need real-time features like chat or location tracking?
Will your app rely heavily on graphics or animations?
What platforms do you want to target-iOS, Android, or both?
What’s your timeline and budget?
Knowing these answers will help you and your development team match the right technologies to your needs.
2. Native vs. Cross-Platform Development
This is often the first fork in the road when choosing a tech stack:
Native Development
If performance, speed, and full access to platform-specific features are a priority, native development is your best bet.
iOS: Swift or Objective-C
Android: Kotlin or Java
Native apps generally provide a smoother user experience and better performance, but they also require separate codebases-meaning higher development costs and longer timelines.
Cross-Platform Development
Cross-platform frameworks allow you to write one codebase and deploy it to both platforms. Popular choices include:
React Native (JavaScript)
Flutter (Dart)
Xamarin (C#)
These tools are ideal for startups or businesses looking to enter the market quickly. A custom mobile app development company can help you weigh the pros and cons based on your app’s complexity and user expectations.
3. Frontend and Backend Technologies
Your mobile app isn’t just the user interface-it likely requires a backend to handle data storage, user authentication, and other services.
Frontend
For cross-platform apps:
React Native (by Facebook): Great for dynamic UIs and native-like performance.
Flutter (by Google): Ideal for high-performance, visually rich applications.
Backend
Popular backend stacks include:
Node.js: Scalable and event-driven, great for real-time applications.
Django (Python): High-security applications and rapid development.
Laravel (PHP): Suitable for content-heavy or enterprise apps.
Firebase: Backend-as-a-Service (BaaS), good for MVPs and quick development cycles.
Your choice should align with the expected user load, app features, and scalability requirements.
4. Database Choices
Your app’s data storage needs also affect your tech stack. Some common options are:
SQLite: Lightweight and good for local storage.
Realm: Ideal for real-time applications.
Firebase Realtime Database or Firestore: Best for cloud-based apps.
PostgreSQL or MongoDB: Suitable for complex, high-volume applications.
A custom mobile app development company can assess which database suits your app based on its size, structure, and security needs.
5. Security Considerations
Security should never be an afterthought. The right tech stack must support modern security standards, including:
Data encryption
Secure authentication (OAuth 2.0, JWT)
Compliance with regulations (e.g., GDPR, HIPAA)
Ensure your chosen technologies are actively maintained and widely used, so you benefit from community support and security patches.
6. Scalability and Maintenance
A good tech stack doesn’t just work today-it should be easy to maintain and scale tomorrow. Technologies with strong community support and regular updates are better choices in the long run.
You’ll also want to consider:
Ease of hiring developers
Cost of long-term maintenance
Integration capabilities with third-party services
7. Work With Experts
Choosing the right tech stack isn’t just about picking popular tools-it’s about selecting the right tools for your specific project. That’s where partnering with a custom mobile app development company can make a difference. They bring experience across multiple stacks and can offer strategic guidance, helping you avoid costly mistakes and focus on what matters most: building a successful product.
Choosing the right tech stack for mobile app development for iOS and Android is a foundational step in your digital journey. From native vs. cross-platform development to backend services and database choices, each decision impacts the app’s performance, cost, and future scalability.
If you’re unsure where to begin, a reputable custom mobile app development company like iTechVision can provide the expertise needed to turn your vision into a high-performing, user-friendly app.
0 notes
Text
Unknown Facts About Flutter App Development & Essential Technologies
Flutter has taken the app development world by unique way but there are many counter-known facts about its ecosystem that can enhance your projects. From Dart technologies to GraphQL, state management, and payment gateways, let’s enter into some unknown truth insights that can streamline your development process.

1. Flutter & Dart – The Speed Secret
Dart’s Just-in-Time (JIT) and Ahead-of-Time (AOT) compilation offer fast development and high-performance execution.
Unlike JavaScript, Dart reduces garbage collection pauses, ensuring a smoother user experience.
Flutter doesn’t use OEM widgets; instead, it renders UI directly using Skia, making animations feel seamless.
Unknown Fact:
Dart has a feature called Isolates, which allows parallel execution without threads. This helps prevent UI lag in complex apps.
2. GraphQL – A Smarter Alternative to REST
Unlike RESTful APIs, GraphQL enables precise data fetching, reducing network calls.
It eliminates over-fetching and under-fetching, leading to faster app performance.
GraphQL is strongly typed, reducing unexpected runtime errors.
Unknown Fact:
GraphQL allows real-time updates via subscriptions, making it perfect for chat apps, stock trading, and collaborative tools.
3. State Management – GetX vs. Provider
GetX is lightweight, reactive, and doesn’t require a Build Context.
Provider is recommended by Google and is ideal for large-scale applications.
GetX offers an in-built dependency injection system, simplifying API calls.
Unknown Fact:
GetX has a persistent storage feature, allowing data retention even after app restarts without using Shared Preferences or local databases.
4. RESTful APIs – The Silent Backbone
REST APIs enable seamless communication between Flutter apps and servers.
Proper API versioning ensures backward compatibility.
Caching REST API responses can significantly improve app performance.
Unknown Fact:

Many developers overlook the use of HTTP/2, which reduces latency and improves performance by handling multiple requests in a single connection.
5. UI/UX – More Than Just Good Looks
Micro-animations enhance user experience and engagement.
Dark Mode & Adaptive UI boost accessibility and battery life.
Material Design & Cupertino widgets allow cross-platform consistency.
Unknown Fact:
Google’s Flutter team suggests using Motion Guidelines to create natural-looking animations that mimic real-world physics.
6. Firebase – More Than Just Authentication
Firestore enables real-time sync and offline support.
Firebase ML can integrate AI features like image recognition.
Firebase App Distribution helps in easy beta testing.
Unknown Fact:
Firebase has a hidden feature called Firebase Extensions, which can automate background tasks like image resizing, translations, and scheduled messaging.
7. Payment Gateways – Secure & Seamless
Stripe & Razorpay provide easy integration with Flutter.
Apple Pay & Google Pay SDKs ensure a frictionless checkout experience.
PCI DSS compliance is essential to handle transactions securely.
Unknown Fact:
Using tokenization instead of storing credit card details can prevent fraud and reduce compliance requirements.
8. Third-Party APIs – Extending Functionality
Google Maps API for location services.
Twilio API for SMS & phone verification.
Algolia API for lightning-fast search capabilities.
Unknown Fact:
Some APIs provide rate-limited free tiers, which can be optimized using request batching and caching mechanisms.
9. Streamlining Backend Operations
CI/CD pipelines (GitHub Actions, Codemagic) speed up deployments.
GraphQL & REST hybrid APIs can optimize backend load.
Serverless functions reduce the need for dedicated backend infrastructure.
Unknown Fact:

Using Redis or Memcached can dramatically improve response times by caching frequent database queries.
One Last Looks:
Flutter development goes beyond just UI design. By leveraging Dart’s Isolates, GraphQL’s real-time capabilities, GetX’s persistence, and Firebase’s automation, developers can build high-performance applications with minimal effort and maximum efficiency. Integrating smart API strategies, payment gateways, and backend optimizations can take your app to the next level.
Are you ready to implement these lesser-known strategies in your next Flutter app?
#hire android developers#custom mobile app development company#cloneappdevelopment#flutter app developers#flutter application development#mobile app development#aiappdevelopmentcompany#software development
0 notes
Text
Exploring the Power of Firebase with FlutterFlow: A Seamless Integration for Flutter Developers
In the rapidly evolving landscape of app development, the synergy between frontend frameworks and backend services plays a pivotal role in crafting seamless user experiences. Flutter, Google's UI toolkit for building natively compiled applications for mobile, web, and desktop from a single codebase, has gained significant traction among developers for its expressive and flexible nature. In parallel, Firebase, Google's mobile and web application development platform, offers a comprehensive suite of tools for app development, including authentication, cloud storage, real-time databases, and more. Combining the power of firebase flutterflow, developers can create robust and scalable applications efficiently. In this article, we delve into the integration of Firebase with Flutter through FlutterFlow, exploring its capabilities and benefits.
Understanding FlutterFlow: FlutterFlow is a visual UI builder and development platform that simplifies the process of building Flutter applications. With FlutterFlow, developers can design and prototype UIs visually, drag-and-drop components, and generate Flutter code automatically. This streamlined approach to app development accelerates the iteration cycle and empowers developers to focus on crafting engaging user experiences rather than getting bogged down by tedious coding tasks.
Integration with Firebase: One of the key strengths of FlutterFlow is its seamless integration with Firebase. By incorporating Firebase services into FlutterFlow projects, developers can leverage the full spectrum of Firebase's features to enhance their applications. Let's explore some of the core Firebase services and how they complement Flutter development:
Authentication: Firebase Authentication provides a robust and secure solution for user authentication, supporting various authentication methods such as email/password, phone number, social media login, and more. With FlutterFlow, integrating Firebase Authentication into an app is straightforward, allowing developers to implement user authentication flows with minimal effort.
Cloud Firestore: Cloud Firestore is a flexible, scalable database for mobile, web, and server development. It seamlessly synchronizes data between clients and the cloud, enabling real-time updates and offline support. By integrating Cloud Firestore with FlutterFlow, developers can build dynamic and responsive applications that store and retrieve data efficiently.
Cloud Storage: Firebase Cloud Storage offers secure and scalable object storage for user-generated content such as images, videos, and documents. With FlutterFlow, developers can easily incorporate Cloud Storage into their apps to enable features like file uploads, downloads, and media sharing.
Real-time Database: Firebase Realtime Database is a cloud-hosted NoSQL database that stores data in JSON format and synchronizes it across connected clients in real-time. This enables collaborative and interactive features such as live chat, multiplayer gaming, and collaborative editing. By integrating Firebase Realtime Database with FlutterFlow, developers can create immersive real-time experiences for their users.
Benefits of Using FlutterFlow with Firebase: The integration of FlutterFlow with Firebase offers several benefits for Flutter developers:
Rapid Development: FlutterFlow's visual UI builder accelerates the development process, allowing developers to create UIs quickly and iterate on designs effortlessly.
Seamless Integration: FlutterFlow seamlessly integrates with Firebase, enabling developers to leverage Firebase's powerful backend services without writing extensive code.
Scalability: Firebase's cloud-based infrastructure scales effortlessly to accommodate growing user bases and increasing data loads, ensuring that applications built with FlutterFlow remain performant and responsive.
Real-time Updates: Firebase's real-time database and synchronization capabilities enable developers to build interactive and collaborative features that update in real-time, enhancing user engagement and retention.
Conclusion: The integration of Firebase with FlutterFlow unlocks a wealth of possibilities for Flutter developers, enabling them to build feature-rich and scalable applications with ease. By leveraging Firebase's robust backend services and FlutterFlow's intuitive UI builder, developers can streamline the app development process and deliver compelling user experiences across platforms. As the mobile and web development landscape continues to evolve, the combination of Flutter and Firebase remains a formidable duo for building innovative and impactful applications.
For more details, visit us:
flutterflow developer
flutterflow ai
flutterflow ios app
flutterflow app builder
0 notes
Text
Building a Zoom Clone with Flutter, Firebase, and JitsiMeet SDK: A Comprehensive Guide
Introduction
Embark on an exciting journey as we delve into the creation of a video conferencing Zoom clone. This project combines the power of innovative technologies, specifically Flutter for seamless app development, Firebase for robust backend support, and JitsiMeet SDK for cutting-edge video conferencing features. Imagine the possibilities – connecting people, fostering collaboration, and bridging distances. Video conferencing apps, with their simplicity and versatility, play a vital role in remote work, education, and social interactions. Join us as we explore the significance of these technologies in crafting an app that transcends barriers and brings people closer to today's digital landscape.
Planning and Setup
Embarking on our Zoom clone journey begins with clearly defining our goals. We establish the purpose of our app – to create a user-friendly video conferencing platform that facilitates seamless communication. Identifying target users and their needs is crucial; whether it's for remote work, virtual education, or connecting loved ones, understanding user requirements shapes our project's direction.
In building our Zoom clone, we've chosen a powerful trio of technologies: Flutter, Firebase, and JitsiMeet SDK. Flutter, known for its efficiency, allows us to create a cross-platform app with a single codebase. Firebase brings a robust backend, offering real-time data storage and user authentication. JitsiMeet SDK, renowned for video conferencing capabilities, integrates seamlessly for a feature-rich experience. The choice of these technologies is justified by their reliability, versatility, and the ability to create a scalable, user-friendly app.
Setting up our development environment involves configuring Flutter and Firebase tools. This ensures a smooth workflow, allowing developers to collaborate effectively and bring our vision of a Zoom clone to life. The planning and setup phase lays the foundation for a successful project that caters to the diverse needs of our users.
Front-end Development with Flutter
The heartbeat of our Zoom clone lies in its user interface. We kick off by crafting wireframes and UI mockups, like blueprints for our digital space. These visuals guide us in designing user-friendly interfaces, ensuring a seamless experience during video calls and other features. Picture it as sketching the layout of a welcoming room – arranging elements for comfort and accessibility.
Navigation is key to a smooth user journey. We set up the map for our app, enabling easy movement between screens, akin to navigating rooms in a house. Integrating Firebase Authentication ensures secure user access. Users can sign in and register with ease, like having a personalized key to enter their virtual meeting space. It's akin to entering a secure conference room with credentials, fostering a sense of trust and control.
Front-end development with Flutter is like crafting the façade of a building – it's where users interact, making it visually appealing and functionally seamless. These design and navigation choices form the basis of our Zoom clone's user-centric experience, shaping a platform that feels intuitive and inviting.
Back-end Development with Firebase
The backbone of our Zoom clone lies in the digital storage space – Firebase Firestore. We configure it to store data in real time, like organizing virtual rooms for user profiles, chat messages, and call logs. Think of it as setting up shelves in a library – each category has its place for easy retrieval and organization.
Security is paramount in our Zoom clone. Implementing Firebase Authentication ensures a secure entry point. Users can sign in and register with peace of mind as if receiving a digital ID card for access. Managing user accounts and permissions is akin to assigning roles in a meeting – ensuring that everyone has the right level of access and control. It's about creating a secure, organized space for users to collaborate and connect.
Back-end development with Firebase is like constructing the infrastructure of our virtual world – it's the support system that ensures our Zoom clone runs smoothly and securely. These configurations form the foundation for user data, interaction, and security, shaping an environment where users can seamlessly communicate and collaborate.
Integrating JitsiMeet SDK for Video Conferencing
JitsiMeet SDK is the wizardry behind our Zoom clone's video conferencing prowess. It brings a bundle of features, like a virtual conference room where users can connect seamlessly. Imagine it as the engine powering our video call experience. We integrate JitsiMeet SDK into our Flutter project, like adding a magic portal to our digital space. This SDK is our secret ingredient, providing video and audio capabilities, chat functionalities, and more.
Now, let's make our Zoom clone come alive with video calls. Configuring video call functionality using JitsiMeet SDK is like setting up a stage for a live performance. Users can initiate calls, join meetings, and experience real-time communication. We handle all events with grace – managing starts, stops, and everything in between. Participant management becomes seamless, akin to orchestrating who's on stage during a performance. It's about creating an interactive and engaging virtual space for users to connect, collaborate, and communicate effortlessly.
Integrating JitsiMeet SDK is the enchantment that turns our Zoom clone into a dynamic video conferencing platform. With its features seamlessly woven into our app, users can experience the magic of virtual connections through crystal-clear video calls.
Testing and Debugging
Before our Zoom clone takes centre stage, it undergoes a rigorous functional testing phase. Every feature and functionality is examined closely, like checking each instrument before a concert. We identify and fix any bugs that may disrupt the harmony of our app. This testing ensures that buttons click, screens transition smoothly, and video calls connect seamlessly. It's like ensuring every piece of our digital orchestra plays in tune, creating an app experience that's reliable and user-friendly.
Our Zoom clone is ready to face the virtual audience, but not without the opinions of our beta testers. User Acceptance Testing (UAT) is like hosting a dress rehearsal. We gather valuable feedback from beta testers who explore the app, highlighting what works well and suggesting improvements. Their insights are our cue to make necessary adjustments – tweaking features, enhancing user interfaces, and polishing the overall experience. UAT is like fine-tuning our performance based on audience reactions, ensuring our Zoom clone resonates with users and meets their expectations.
Testing and debugging are the final acts before the grand unveiling, ensuring that our Zoom clone is not only visually appealing but also functions flawlessly for users worldwide.
Deployment and Launch
It's showtime for our Zoom clone! First, we deploy the app to the Google Play Store and Apple App Store – the virtual stages where users can discover and download our creation. This is like hanging up posters for our digital concert, inviting users to join the experience. For those on the web, we configure Firebase Hosting, offering a space where users can access our Zoom clone seamlessly from their browsers. It's akin to setting up an online ticket booth, ensuring accessibility for everyone.
The curtains rise as we announce the launch on social media platforms and tech communities. We share the excitement surrounding our Zoom clone, engaging potential users and tech enthusiasts. Implementing marketing strategies is like inviting a global audience to our virtual event – from creating engaging content to collaborating with influencers. We want our Zoom clone to be the talk of the digital town. It's about building anticipation, attracting users, and gaining traction in the vast landscape of online platforms.
Deployment and launch mark the grand finale, where our Zoom clone steps into the spotlight. Through effective hosting, deployment, and strategic marketing, we aim to captivate users and create a buzz that resonates far and wide.
Why choose a ready-made Zoom clone from Oyelabs for launching in the USA?
Choosing a ready-made Zoom clone from Oyelabs for launching in the USA presents several advantages that align with the needs of businesses and entrepreneurs. Here are compelling reasons to opt for Oyelabs' Zoom clone:
Time Efficiency
Oyelabs' ready-made Zoom clone significantly reduces development time. Instead of starting from scratch, you can quickly launch your platform, saving valuable time and getting ahead in the competitive market.
Proven Technology
Oyelabs employs proven technologies to build their Zoom clone, ensuring reliability and performance. This means you can leverage a solution that has been tested and refined, reducing the risk associated with custom development.
Cost-Effectiveness
Building a video conferencing platform from the ground up involves substantial costs. Oyelabs' ready-made Zoom clone offers a cost-effective solution, providing a feature-rich product at a fraction of the cost compared to custom development.
Ready for Launch
Oyelabs' Zoom clone is ready for deployment, allowing you to launch your platform swiftly. This is particularly advantageous if you're looking to capitalize on the increasing demand for video conferencing solutions in the USA.
Customization Options
While a ready-made solution, Oyelabs often provides customization options to tailor the Zoom clone to your specific branding and feature requirements. This allows for a degree of uniqueness while still benefiting from a pre-built foundation.
Technical Support
Oyelabs typically offers technical support and assistance during the setup and initial launch phase, guiding you to ensure a smooth deployment of your Zoom clone.
Focus on Marketing and Growth
By choosing a ready-made solution, you can shift your focus towards marketing, user acquisition, and business growth rather than getting entangled in the intricacies of development.
Launching a ready-made Zoom clone from Oyelabs in the USA provides a strategic advantage, allowing you to enter the market swiftly, minimize development risks, and focus on building a successful video conferencing platform.
Conclusion
As we conclude the exciting journey of crafting a Zoom clone with Flutter, Firebase, and JitsiMeet SDK, it's essential to reflect on the progress made. This project signifies the power of technology in fostering seamless communication. Embrace the value of user feedback, urging ongoing updates for an evolving, user-centric experience. The potential of our app is immense, promising to facilitate remote collaboration and communication across diverse industries. Let's continue refining, innovating, and contributing to a digital landscape where connection knows no boundaries. The journey doesn't end here – it's an ongoing exploration of possibilities in the realm of virtual connectivity.
0 notes
Text
Flutter Tutorial - Flutter Web Chat UI With StreamChat - Response Web App 3/3
Flutter Tutorial – Flutter Web Chat UI With StreamChat – Response Web App 3/3
TIMELINE 0:00 Introduction Web Chat UI 0:32 Introduction Authentication 1:15 Google Sign In 4:51 Stream Chat Authentication 7:05 Stream Chat Generate … source

View On WordPress
#App#athlean x#build chat app flutter#Chat#chat app flutter#chat app flutter firebase#Flutter#flutter chat#flutter chat app#flutter chat app firestore#flutter chat app tutorial#flutter chat app with firebase#flutter chat application#flutter chat firebase#flutter chat ui#flutter firebase#flutter firebase app#flutter firebase tutorial#flutter full app#flutter real time chat#flutter realtime chat app#flutter tutorial firebase#official athlean x#rachel aust#Response#StreamChat#tutorial#Web#yoga with adriene
0 notes
Photo

Build a Chat App with Flutter and Firebase include Source Code ☞ https://morioh.com/p/f7b8469839f8
#morioh #flutter #firebase #firestore
1 note
·
View note
Text
How to Create Gradient Chat Bubbles in Flutter?
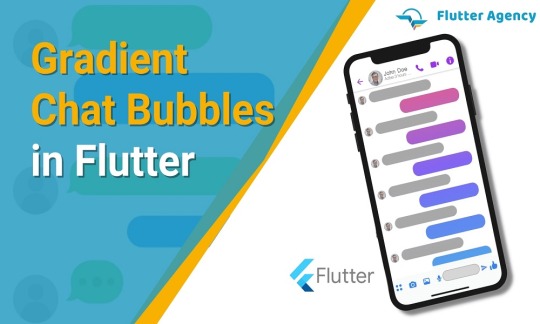
In the present scenario, many developers focus on the best way to build a professional and beautiful chat bubble in an application. If you are a programmer and want an application with a perfect platform, you can switch to flutter. Creating a gradient chat bubble in Flutter is so easy.
Flutter development companies has complete information regarding Flutter platform. Some professionals write code from scratch. On the other hand, in-built stuff for the Flutter, like transform and custompainter widget is a good option for the chat bubble.
Traditionally, chat apps show a message in a chat bubble with a solid background.
Many users want modern chat apps that show chat bubbles with a gradient.
For this concern, expertise puts effort into fulfilling user requirements by adding gradient chat bubbles in the project.
Experts use gradients depending on the bubble position on the screen.
Dedicated team may also modernize the chat messaging app UI with a gradient background for the chat bubble.
Which challenges are recognized?
Traditional chat bubbles utilize decoratedBox or other widgets to paint a rounded rectangle in each chat message. It is suitable for a solid color and gradient repeated in every bubble.
Moreover, gradient, modern, and full-screen bubble backgrounds need a different approach. Complete screen gradient that merges with bubble scroll up and down screen involves approach. It lets developers make an informed decision for painting that suits layout information.
Experienced programmers have the proper knowledge and skill to create gradient chat bubbles in an application.
Every bubble gradient needs a bubble location on the screen.
Painting behavior involves access to layout information.
Such painting behavior is never possible with the widget due to widgets such as decoratedBox and Container widget.
You can make the right decision about the background color before the layout happens.
You can use custom painting behavior in that scenario and never go for custom layout behavior.
CustomPainter is an impressive option for completing a job.
In certain cases, you can gain complete control over child layout and never control over painting or hit testing. You may consider a flow widget. Custom RenderBox is best when you require control over painting, hit testing, and layout.
Also Read: How to Solve Command Not Found in Flutter?
How to change original background widget?
Change widget is responsible for drawing background with a new widget like BubbleBackground. You must add color property and represent a complete screen gradient related to the bubble.
BubbleBackground( colors: message.isMine ? const [Color(0xFF6C7689), Color(0xFF3A364B)] : const [Color(0xFF19B7FF), Color(0xFF491CCB)], child: DefaultTextStyle.merge( style: const TextStyle( fontSize: 18.0, color: Colors.white, ), child: Padding( padding: const EdgeInsets.all(12.0), child: Text(message.text), ), ), );
How to build custom painter?
Developers implement BubbleBackground as a stateless widget. It is vital to define the build () method to return CustomPaint with a CustomPainter like BubblePainter. BubblePainter is ideal for painting a bubble gradient.
@immutable class BubbleBackground extends StatelessWidget { const BubbleBackground({ super.key, required this.colors, this.child, }); final List<Color> colors; final Widget? child; @override Widget build(BuildContext context) { return CustomPaint( painter: BubblePainter( colors: colors, ), child: child, ); } } class BubblePainter extends CustomPainter { BubblePainter({ required List<Color> colors, }) : _colors = colors; final List<Color> _colors; @override void paint(Canvas canvas, Size size) { // TODO: } @override bool shouldRepaint(BubblePainter oldDelegate) { // TODO: return false; } }
Also Read: How to get all data from a Firestore collection in flutter?
How to bring access to scrolling details?
CustomPainter needs information mandatory to evaluate where the bubble is within bound. The viewport is a vital asset to list view. With the help of viewport, you can determine the location and require reference to scrollable state and Bubble Background buildContext. You can get access to scrolling information to CustomPainter.
BubblePainter( colors: colors, bubbleContext: context, scrollable: ScrollableState(), ) class BubblePainter extends CustomPainter { BubblePainter({ required ScrollableState scrollable, required BuildContext bubbleContext, required List<Color> colors, }) : _scrollable = scrollable, _bubbleContext = bubbleContext, _colors = colors; final ScrollableState _scrollable; final BuildContext _bubbleContext; final List<Color> _colors; @override bool shouldRepaint(BubblePainter oldDelegate) { return oldDelegate._scrollable != _scrollable || oldDelegate._bubbleContext != _bubbleContext || oldDelegate._colors != _colors; } }
How to cover full-screen bubble gradient?
CustomPainter is reliable for bringing desired gradient color and reference to containing ScrollableState and bubble BuildContext. With the necessary information, CustomPainter covers a full-screen bubble gradient.
Implementing the paint() method is the best way to calculate bubble position and configure the shader with the given color. Developers may also utilize matrix translation to offset shader depending on bubble position with scrollable widget.
class BubblePainter extends CustomPainter { BubblePainter({ required ScrollableState scrollable, required BuildContext bubbleContext, required List<Color> colors, }) : _scrollable = scrollable, _bubbleContext = bubbleContext, _colors = colors; final ScrollableState _scrollable; final BuildContext _bubbleContext; final List<Color> _colors; @override bool shouldRepaint(BubblePainter oldDelegate) { return oldDelegate._scrollable != _scrollable || oldDelegate._bubbleContext != _bubbleContext || oldDelegate._colors != _colors; } @override void paint(Canvas canvas, Size size) { final scrollableBox = _scrollable.context.findRenderObject() as RenderBox; final scrollableRect = Offset.zero & scrollableBox.size; final bubbleBox = _bubbleContext.findRenderObject() as RenderBox; final origin = bubbleBox.localToGlobal(Offset.zero, ancestor: scrollableBox); final paint = Paint() ..shader = ui.Gradient.linear( scrollableRect.topCenter, scrollableRect.bottomCenter, _colors, [0.0, 1.0], TileMode.clamp, Matrix4.translationValues(-origin.dx, -origin.dy, 0.0).storage, ); canvas.drawRect(Offset.zero & size, paint); } }
Once you complete the above code, you can get a modern chat bubble UI. Each bubble gradient changes the user scroll due to the bubble background widget invoking scrollable.of (context). The method can set up an inherent dependency on the predecessor scrollable state.
You can note every step carefully and start and finish tasks on time. Hire Flutter developer for perfect guidance to implement necessary measures, ensure a smooth workflow and build your own Flutter mobile app.
A chat feature is available in different types of the app today, from messaging to an ecommerce mobile app development and education apps to social networks. Gradient bubbles have impressive attributes.
Developers make apps with different background colors for incoming and outgoing messages that suit quick identification. Right painting decision is also crucial for layout information and position widget.
Output:

Conclusion:
Flutter is an exciting and fantastic platform for quickly creating applications. You can hire Flutter developers from an award-winning Flutter app development company like Flutter agency who are happy to work with you!
Frequently Asked Questions (FAQs)
1. How many kinds of gradients are in Flutter?
Flutter has three types of gradient: Linear Gradient, Radial Gradient, and Sweep Gradient.
2. What are the stops in gradient Flutter?
Stops list the values from 0.0 to 1.0, denoting fractions along with their gradient. Also,non-null has a list which has a similar length as colors. If the first value is not 0.0, then a stop with the position of 0.0 and the color is equivalent to the first color in the colors is implied.
3. What is the method to make a chat bubble on Flutter?
Create the new dart file, known as custom_shape.dart, inside a lib folder. After that, build the custom shape with a custom painter class. This class is used to draw a custom shape at the end of the chat bubble.
Originally Published At: https://flutteragency.com/create-gradient-chat-bubbles-in-flutter/
0 notes
Text
How to build a chat application in Flutter with Firebase

Today, we will create a straightforward yet complex chat application in Flutter with Firebase at its backend. Our primary focus is on working the application and connecting it with Firebase services like Cloud Firestore, Firebase Storage, and Firebase Authentication.
What are we going to cover in the article?
We will understand the basic functionality of a chat application so that enthusiasts like you and me can learn from it. Of course, this demo app is not as complex as WhatsApp or Telegram, but after reading this article, you will understand how other famous chat applications work.
Creating a new Flutter application
Android Studio has been updated to Bumblebee, and it’s pretty colorful now on its main screen. Just click on the New Flutter Project button, and it will confirm the Flutter SDK path; click Next.
Then, enter your desired project name — make sure that it is in small letters. Choose your directory correctly and make sure you have selected all the desired platforms like Android, iOS, and the web.
With that done, you will have your Flutter starter project, famously known as the counter application, created.
Connecting to Firebase Services (the new and updated method)
If you plan to use Firebase as your backend, I recommend connecting your project to Firebase before programming your application any further.
Go to and create a new Firebase project. Enter your project name, disable Google Analytics for now, and click on the Create Project button.
According to the Flutter Fire documentation, you can now initialize Firebase directly from Dart. It’s straightforward, so cheers to the Flutter team.
Run this command from the root of your project in the terminal window to add the Firebase core plugin:
flutter pub add firebase_core
Next, you have to run the FlutterFire CLI command, which depends on the Firebase CLI command. If you are not familiar with the Firebase CLI command, please go through this document to understand and install it on your system.
Run this command to activate FlutterFire CLI:
dart pub global activate flutterfire_cli
Next, run this command and choose the Firebase project you just created:
flutterfire configure
After running this command and connecting to your Firebase project, you will see that the firebase_options.dart file has been created in your project structure, containing all the necessary information.
N.B., now you no longer need to manually add the google-services.json file to Android and the GoogleService-Info.plist file to the iOS runner directory.
In your main.dart file, you need to edit the main() function and ensure WidgetFlutterBinding is initialized and then initialize Firebase like this:
void main() async { WidgetsFlutterBinding.ensureInitialized(); await Firebase.initializeApp( options: DefaultFirebaseOptions.currentPlatform, ); runApp(MyApp()); }
Once initialized, you are now ready to use Flutter Fire and all its services.
Since we will use Google Sign-In for our chat application, Firebase requires SHA-1 and SHA-256 certificates to be added to our Android app inside the Firebase project. Again, you can go through this document to read all about it.
In Android Studio, right click on /gradlew and open with the terminal. Then run this command:
./gradlew signingReport
With this, the signing report generates for your application. Copy the SHA-1 and SHA-256 certificate fingerprints and add them to the project settings inside your Firebase project, under Android App.
Inside your Firebase project, click on the Authentication tab, click on the Sign-in method, and under Sign-in providers, add Google.
Click on the Firestore Database and Create a database under Test mode.
This is optional, but recommended: to improve iOS and Mac build time, add this line to your iOS/Podfile under Runner:
pod 'FirebaseFirestore', :git => 'https://github.com/invertase/firestore-ios-sdk-frameworks.git', :tag => '8.11.0'
N.B., here it is assumed you have CocoaPods installed on your system.
Click on Firebase Storage and Create new storage under Test Mode.
Go to Firebase project settings, click on Apple Apps, and download the GoogleServices-Info.plist file.
I know I mentioned earlier that you do not need to add the GoogleServices file to the iOS app. But since we will use the Google Sign-In package, iOS integration documentation on the pub.dev website says otherwise. You have to add CFBundleURLTypes attributes given below in the ios/Runner/Info.plist file:
!-- Put me in the [my_project]/ios/Runner/Info.plist file --> <!-- Google Sign-in Section --> <key>CFBundleURLTypes</key> <array> <dict> <key>CFBundleTypeRole</key> <string>Editor</string> <key>CFBundleURLSchemes</key> <array> <!-- TODO Replace this value: --> <!-- Copied from GoogleService-Info.plist key REVERSED_CLIENT_ID --> <string>com.googleusercontent.apps.861823949799-vc35cprkp249096uujjn0vvnmcvjppkn</string> </array> </dict> </array> <!-- End of the Google Sign-in Section -->
Now you have successfully configured your Android and iOS application with Firebase. We are creating a Flutter chat application, but platform-specific integrations are required for the Google Sign-In to work correctly.
Let’s talk about web integration before uploading our completed application to Firebase Hosting.
Building a basic UI for the chat application
We have a total of five screens given below in order.
Splash page
Login page
Homepage
Profile page (settings screen)
Chat page
I’m not going into too many details about each screen because that is unimportant. So instead, I will give an overview for each screen.
Splash Page: It has two text widgets and an image at its center
Login Page: Two text widgets again, an image, and a Google Sign-In button
Home Page: Scaffold, AppBar with two action buttons for a profile page and logging out. It has a search bar for searching users. ListTile consists of the user’s name and Google profile image
Profile Page: Here, users can change their display name and add a few details of themselves. Also, upload an image of themselves
Chat Page: A very similar screen to most prominent chat applications. Message portion at the top of the screen and text field with image and send button at the bottom of the screen
Now, let us start programming the application. I will post only the vital parts of the application code, and the rest is available on the GitHub repository, for which I will leave links as we move along further in this article.
Add required dependencies in the pubspec.yaml file
firebase_core: ^1.12.0 firebase_auth: ^3.3.7 cloud_firestore: ^3.1.8 firebase_storage: ^10.2.7 google_sign_in: ^5.2.4 fluttertoast: ^8.0.8 image_picker: ^0.8.4+9 shared_preferences: ^2.0.13 intl: ^0.17.0 photo_view: ^0.13.0 provider: ^6.0.2 country_code_picker: ^2.0.2 url_launcher: ^6.0.20 equatable: ^2.0.3 google_sign_in_web: ^0.10.0+5
Please check for the latest versions on the pub.dev website.
Uncomment assets to add images to the assets of the application:
- assets/images/
Building a login page with Firebase Authentication
Step 1: The ChatUser model
Before we get into the authentication part, we need a user model class. I have named it as ChatUser, which has five string variables: id, photoURL, displayName, phoneNumber, and aboutMe.
Our two functions inside our ChatUser class toJson() consist of a Map and a factory method to read data from the snapshot that Firebase Firestore returns:
class ChatUser extends Equatable { final String id; final String photoUrl; final String displayName; final String phoneNumber; final String aboutMe; const ChatUser( {required this.id, required this.photoUrl, required this.displayName, required this.phoneNumber, required this.aboutMe});
Step 2: The AuthProvider class
Next, we will add an AuthProvider class to our project to handle Google sign-in and sign-out methods. This is also to check whether the user is logged in or not:
class AuthProvider extends ChangeNotifier { final GoogleSignIn googleSignIn; final FirebaseAuth firebaseAuth; final FirebaseFirestore firebaseFirestore; final SharedPreferences prefs; Status _status = Status.uninitialized; Status get status => _status; AuthProvider( {required this.googleSignIn, required this.firebaseAuth, required this.firebaseFirestore, required this.prefs}); String? getFirebaseUserId() { return prefs.getString(FirestoreConstants.id); } Future<bool> isLoggedIn() async { bool isLoggedIn = await googleSignIn.isSignedIn(); if (isLoggedIn && prefs.getString(FirestoreConstants.id)?.isNotEmpty == true) { return true; } else { return false; } } Future<bool> handleGoogleSignIn() async { _status = Status.authenticating; notifyListeners(); GoogleSignInAccount? googleUser = await googleSignIn.signIn(); if (googleUser != null) { GoogleSignInAuthentication? googleAuth = await googleUser.authentication; final AuthCredential credential = GoogleAuthProvider.credential( accessToken: googleAuth.accessToken, idToken: googleAuth.idToken, ); User? firebaseUser = (await firebaseAuth.signInWithCredential(credential)).user; if (firebaseUser != null) { final QuerySnapshot result = await firebaseFirestore .collection(FirestoreConstants.pathUserCollection) .where(FirestoreConstants.id, isEqualTo: firebaseUser.uid) .get(); final List<DocumentSnapshot> document = result.docs; if (document.isEmpty) { firebaseFirestore .collection(FirestoreConstants.pathUserCollection) .doc(firebaseUser.uid) .set({ FirestoreConstants.displayName: firebaseUser.displayName, FirestoreConstants.photoUrl: firebaseUser.photoURL, FirestoreConstants.id: firebaseUser.uid, "createdAt: ": DateTime.now().millisecondsSinceEpoch.toString(), FirestoreConstants.chattingWith: null });}
Step 3: Splash page
We will create the splash page and check whether the user is logged in using our method from the authProvider class.
If the user has already signed in with the Google Sign-In method, the user will be redirected to the home page. Otherwise, the user will be directed to the login page.
Step 4: Login page
Next, we will now create our login page.
Since we are using Provider state management in our application, we are going to create an instance of our authProvider like this:
final authProvider = Provider.of<AuthProvider>(context);
Next, we will check the status of our application if it is authenticated:
class _LoginPageState extends State<LoginPage> { @override Widget build(BuildContext context) { final authProvider = Provider.of<AuthProvider>(context); switch (authProvider.status) { case Status.authenticateError: Fluttertoast.showToast(msg: 'Sign in failed'); break; case Status.authenticateCanceled: Fluttertoast.showToast(msg: 'Sign in cancelled'); break; case Status.authenticated: Fluttertoast.showToast(msg: 'Sign in successful'); break; default: break; }
Step 5: Sign-in function
We will now add our Google Sign-In method to our onTap function for the Google Sign-In button:
GestureDetector( onTap: () async { bool isSuccess = await authProvider.handleGoogleSignIn(); if (isSuccess) { Navigator.pushReplacement( context, MaterialPageRoute( builder: (context) => const HomePage())); } }, child: Image.asset('assets/images/google_login.jpg'), ),
Creating a homepage with user contacts
Step 1: The HomeProvider class
This class contains two functions:
To update data on the Cloud Firestore database:
Future<void> updateFirestoreData( String collectionPath, String path, Map<String, dynamic> updateData) { return firebaseFirestore .collection(collectionPath) .doc(path) .update(updateData); }
To receive a snapshot of data from the Cloud Firestore database:
Stream<QuerySnapshot> getFirestoreData( String collectionPath, int limit, String? textSearch) { if (textSearch?.isNotEmpty == true) { return firebaseFirestore .collection(collectionPath) .limit(limit) .where(FirestoreConstants.displayName, isEqualTo: textSearch) .snapshots(); } else { return firebaseFirestore .collection(collectionPath) .limit(limit) .snapshots(); } }
Step 2: Homepage
The homepage is divided into three sections.
The AppBar — it consists of two buttons, the sign-out button and profile page button:
Scaffold( appBar: AppBar( centerTitle: true, title: const Text('Smart Talk'), actions: [ IconButton( onPressed: () => googleSignOut(), icon: const Icon(Icons.logout)), IconButton( onPressed: () { Navigator.push( context, MaterialPageRoute( builder: (context) => const ProfilePage())); }, icon: const Icon(Icons.person)), ]),);
The search bar — for searching the logged-in users inside the application. If you have a long list of users, it comes in handy. We will use a StreamBuilder to build our search bar like this:
Widget buildSearchBar() { return Container( margin: const EdgeInsets.all(Sizes.dimen_10), height: Sizes.dimen_50, child: Row( crossAxisAlignment: CrossAxisAlignment.center, children: [ const SizedBox( width: Sizes.dimen_10, ), const Icon( Icons.person_search, color: AppColors.white, size: Sizes.dimen_24, ), const SizedBox( width: 5, ), Expanded( child: TextFormField( textInputAction: TextInputAction.search, controller: searchTextEditingController, onChanged: (value) { if (value.isNotEmpty) { buttonClearController.add(true); setState(() { _textSearch = value; }); } else { buttonClearController.add(false); setState(() { _textSearch = ""; }); } }, decoration: const InputDecoration.collapsed( hintText: 'Search here...', hintStyle: TextStyle(color: AppColors.white), ), ), ), StreamBuilder( stream: buttonClearController.stream, builder: (context, snapshot) { return snapshot.data == true ? GestureDetector( onTap: () { searchTextEditingController.clear(); buttonClearController.add(false); setState(() { _textSearch = ''; }); }, child: const Icon( Icons.clear_rounded, color: AppColors.greyColor, size: 20, ), ) : const SizedBox.shrink(); }) ], ), decoration: BoxDecoration( borderRadius: BorderRadius.circular(Sizes.dimen_30), color: AppColors.spaceLight, ), ); }
Users — with StreamBuilder, we will show all logged-in users here. Using the ListTile widget inside the ListView separated builder method, we display the user’s profile image and the user’s name:
Widget buildItem(BuildContext context, DocumentSnapshot? documentSnapshot) { final firebaseAuth = FirebaseAuth.instance; if (documentSnapshot != null) { ChatUser userChat = ChatUser.fromDocument(documentSnapshot); if (userChat.id == currentUserId) { return const SizedBox.shrink(); } else { return TextButton( onPressed: () { if (KeyboardUtils.isKeyboardShowing()) { KeyboardUtils.closeKeyboard(context); } Navigator.push( context, MaterialPageRoute( builder: (context) => ChatPage( peerId: userChat.id, peerAvatar: userChat.photoUrl, peerNickname: userChat.displayName, userAvatar: firebaseAuth.currentUser!.photoURL!, ))); }, child: ListTile( leading: userChat.photoUrl.isNotEmpty ? ClipRRect( borderRadius: BorderRadius.circular(Sizes.dimen_30), child: Image.network( userChat.photoUrl, fit: BoxFit.cover, width: 50, height: 50, loadingBuilder: (BuildContext ctx, Widget child, ImageChunkEvent? loadingProgress) { if (loadingProgress == null) { return child; } else { return SizedBox( width: 50, height: 50, child: CircularProgressIndicator( color: Colors.grey, value: loadingProgress.expectedTotalBytes != null ? loadingProgress.cumulativeBytesLoaded / loadingProgress.expectedTotalBytes! : null), ); } }, errorBuilder: (context, object, stackTrace) { return const Icon(Icons.account_circle, size: 50); }, ), ) : const Icon( Icons.account_circle, size: 50, ), title: Text( userChat.displayName, style: const TextStyle(color: Colors.black), ), ), ); } } else { return const SizedBox.shrink(); } }
Making a profile page that updates Firebase Firestore information
Here, users can change their display names, write something about themselves, and add their contact information.
There are three TextFields and a dropdown to select a country code before entering the mobile number. Next, users click on the profile picture and choose another to replace it, then there’s a button to update the information onto the Firebase Firestore database. Let’s get to it.
Step 1: ProfileProvider class
We will add another class to our project structure and call it ProfileProvider. There are two main functions inside this class.
To upload the image file to Firebase Storage:
UploadTask uploadImageFile(File image, String fileName) { Reference reference = firebaseStorage.ref().child(fileName); UploadTask uploadTask = reference.putFile(image); return uploadTask; }
To upload updated information regarding the user to the Firestore database:
Future<void> updateFirestoreData(String collectionPath, String path, Map<String, dynamic> dataUpdateNeeded) { return firebaseFirestore .collection(collectionPath) .doc(path) .update(dataUpdateNeeded); }
Step 2: Profile page
There are three main methods inside this ProfilePage stateful widget.
An image picker method to pick a picture from the device and set it as a profile picture:
Future getImage() async { ImagePicker imagePicker = ImagePicker(); // PickedFile is not supported // Now use XFile? XFile? pickedFile = await imagePicker .pickImage(source: ImageSource.gallery) .catchError((onError) { Fluttertoast.showToast(msg: onError.toString()) }); File? image; if (pickedFile != null) { image = File(pickedFile.path); } if (image != null) { setState(() { avatarImageFile = image; isLoading = true; }); uploadFile(); } }
Upload that picture to Firebase Storage and save its photo URL information to the Firestore database under User Information:
Future uploadFile() async { String fileName = id; UploadTask uploadTask = profileProvider.uploadImageFile(avatarImageFile!, fileName); try { TaskSnapshot snapshot = await uploadTask; photoUrl = await snapshot.ref.getDownloadURL(); ChatUser updateInfo = ChatUser(id: id, photoUrl: photoUrl, displayName: displayName, phoneNumber: phoneNumber, aboutMe: aboutMe); profileProvider.updateFirestoreData( FirestoreConstants.pathUserCollection, id, updateInfo.toJson()) .then((value) async { await profileProvider.setPrefs(FirestoreConstants.photoUrl, photoUrl); setState(() { isLoading = false; }); }); } on FirebaseException catch (e) { setState(() { isLoading = false; }); Fluttertoast.showToast(msg: e.toString()); } }
Upload data to the Firestore database and update the data under User Information:
void updateFirestoreData() { focusNodeNickname.unfocus(); setState(() { isLoading = true; if (dialCodeDigits != "+00" && _phoneController.text != "") { phoneNumber = dialCodeDigits + _phoneController.text.toString(); } }); ChatUser updateInfo = ChatUser(id: id, photoUrl: photoUrl, displayName: displayName, phoneNumber: phoneNumber, aboutMe: aboutMe); profileProvider.updateFirestoreData( FirestoreConstants.pathUserCollection, id, updateInfo.toJson()) .then((value) async { await profileProvider.setPrefs( FirestoreConstants.displayName, displayName); await profileProvider.setPrefs( FirestoreConstants.phoneNumber, phoneNumber); await profileProvider.setPrefs( FirestoreConstants.photoUrl, photoUrl,); await profileProvider.setPrefs( FirestoreConstants.aboutMe,aboutMe ); setState(() { isLoading = false; }); Fluttertoast.showToast(msg: 'UpdateSuccess'); }).catchError((onError) { Fluttertoast.showToast(msg: onError.toString()); }); }
Building the chat message page
Let’s talk about the chat page’s functionalities step by step to better understand how this section will work.
Step 1: ChatMessage Model Class
First, we will create a new model class for ChatMessages, consisting of four string variables: idFrom, idTo, timestamp, content, and an integer type. Then, again, similar to our ChatUser model, we will add two functions to Json consisting of a Map and a factory method that returns DocumentSnapshot from the Firestore database. That’s it for our model class:
class ChatMessages { String idFrom; String idTo; String timestamp; String content; int type; ChatMessages( {required this.idFrom, required this.idTo, required this.timestamp, required this.content, required this.type}); Map<String, dynamic> toJson() { return { FirestoreConstants.idFrom: idFrom, FirestoreConstants.idTo: idTo, FirestoreConstants.timestamp: timestamp, FirestoreConstants.content: content, FirestoreConstants.type: type, }; } factory ChatMessages.fromDocument(DocumentSnapshot documentSnapshot) { String idFrom = documentSnapshot.get(FirestoreConstants.idFrom); String idTo = documentSnapshot.get(FirestoreConstants.idTo); String timestamp = documentSnapshot.get(FirestoreConstants.timestamp); String content = documentSnapshot.get(FirestoreConstants.content); int type = documentSnapshot.get(FirestoreConstants.type); return ChatMessages( idFrom: idFrom, idTo: idTo, timestamp: timestamp, content: content, type: type); } }
Step 2: ChatProvider Class
There are four main methods inside our ChatProvider class for sending and receiving text messages and images.
To upload an image file to Firebase Storage:
UploadTask uploadImageFile(File image, String filename) { Reference reference = firebaseStorage.ref().child(filename); UploadTask uploadTask = reference.putFile(image); return uploadTask; }
To update the Firestore database information regarding user IDs who will be chatting with each other:
Future<void> updateFirestoreData( String collectionPath, String docPath, Map<String, dynamic> dataUpdate) { return firebaseFirestore .collection(collectionPath) .doc(docPath) .update(dataUpdate); }
To get a stream of chat messages from the Firestore database while users chat with each other:
Stream<QuerySnapshot> getChatMessage(String groupChatId, int limit) { return firebaseFirestore .collection(FirestoreConstants.pathMessageCollection) .doc(groupChatId) .collection(groupChatId) .orderBy(FirestoreConstants.timestamp, descending: true) .limit(limit) .snapshots(); }
To send messages to other users with the help of the Firestore database and save those messages inside it:
void sendChatMessage(String content, int type, String groupChatId, String currentUserId, String peerId) { DocumentReference documentReference = firebaseFirestore .collection(FirestoreConstants.pathMessageCollection) .doc(groupChatId) .collection(groupChatId) .doc(DateTime.now().millisecondsSinceEpoch.toString()); ChatMessages chatMessages = ChatMessages( idFrom: currentUserId, idTo: peerId, timestamp: DateTime.now().millisecondsSinceEpoch.toString(), content: content, type: type); FirebaseFirestore.instance.runTransaction((transaction) async { transaction.set(documentReference, chatMessages.toJson()); }); }
Step 3: Chat page
First, we need to create two methods to check if:
A chat message was sent:
// checking if sent message bool isMessageSent(int index) { if ((index > 0 && listMessages[index - 1].get(FirestoreConstants.idFrom) != currentUserId) || index == 0) { return true; } else { return false; } }
A chat message was received:
// checking if received message bool isMessageReceived(int index) { if ((index > 0 && listMessages[index - 1].get(FirestoreConstants.idFrom) == currentUserId) || index == 0) { return true; } else { return false; } }
Second, we will create a method to send chat messages and execute our sendChatMessage function from our ChatProvider class:
void onSendMessage(String content, int type) { if (content.trim().isNotEmpty) { textEditingController.clear(); chatProvider.sendChatMessage( content, type, groupChatId, currentUserId, widget.peerId); scrollController.animateTo(0, duration: const Duration(milliseconds: 300), curve: Curves.easeOut); } else { Fluttertoast.showToast( msg: 'Nothing to send', backgroundColor: Colors.grey); } }
Third, we need two more methods to pick an image from the device folder and send that image to the user.
Pick image from device:
Future getImage() async { ImagePicker imagePicker = ImagePicker(); XFile? pickedFile; pickedFile = await imagePicker.pickImage(source: ImageSource.gallery); if (pickedFile != null) { imageFile = File(pickedFile.path); if (imageFile != null) { setState(() { isLoading = true; }); uploadImageFile(); } } }
Send the image to the user with whom we are chatting, save the image to Firebase Storage, and save its URL information to the Firestore database:
void uploadImageFile() async { String fileName = DateTime.now().millisecondsSinceEpoch.toString(); UploadTask uploadTask = chatProvider.uploadImageFile(imageFile!, fileName); try { TaskSnapshot snapshot = await uploadTask; imageUrl = await snapshot.ref.getDownloadURL(); setState(() { isLoading = false; onSendMessage(imageUrl, MessageType.image); }); } on FirebaseException catch (e) { setState(() { isLoading = false; }); Fluttertoast.showToast(msg: e.message ?? e.toString()); } }
Fourth, we need to create an input field where the user will type the text message and click on the Send button to send the message. Also, an image picker button so that when the user clicks on it, the file picker from the device will open up to pick an image and send it to the user:
Widget buildMessageInput() { return SizedBox( width: double.infinity, height: 50, child: Row( children: [ Container( margin: const EdgeInsets.only(right: Sizes.dimen_4), decoration: BoxDecoration( color: AppColors.burgundy, borderRadius: BorderRadius.circular(Sizes.dimen_30), ), child: IconButton( onPressed: getImage, icon: const Icon( Icons.camera_alt, size: Sizes.dimen_28, ), color: AppColors.white, ), ), Flexible( child: TextField( focusNode: focusNode, textInputAction: TextInputAction.send, keyboardType: TextInputType.text, textCapitalization: TextCapitalization.sentences, controller: textEditingController, decoration: kTextInputDecoration.copyWith(hintText: 'write here...'), onSubmitted: (value) { onSendMessage(textEditingController.text, MessageType.text); }, )), Container( margin: const EdgeInsets.only(left: Sizes.dimen_4), decoration: BoxDecoration( color: AppColors.burgundy, borderRadius: BorderRadius.circular(Sizes.dimen_30), ), child: IconButton( onPressed: () { onSendMessage(textEditingController.text, MessageType.text); }, icon: const Icon(Icons.send_rounded), color: AppColors.white, ), ), ], ), ); }
Fifth, we will create chat bubbles for the sent and received text messages with profile photos.
Widget buildItem(int index, DocumentSnapshot? documentSnapshot) { if (documentSnapshot != null) { ChatMessages chatMessages = ChatMessages.fromDocument(documentSnapshot); if (chatMessages.idFrom == currentUserId) { // right side (my message) return Column( crossAxisAlignment: CrossAxisAlignment.end, children: [ Row( mainAxisAlignment: MainAxisAlignment.end, children: [ chatMessages.type == MessageType.text ? messageBubble( chatContent: chatMessages.content, color: AppColors.spaceLight, textColor: AppColors.white, margin: const EdgeInsets.only(right: Sizes.dimen_10), ) : chatMessages.type == MessageType.image ? Container( margin: const EdgeInsets.only( right: Sizes.dimen_10, top: Sizes.dimen_10), child: chatImage( imageSrc: chatMessages.content, onTap: () {}), ) : const SizedBox.shrink(), isMessageSent(index) ? Container( clipBehavior: Clip.hardEdge, decoration: BoxDecoration( borderRadius: BorderRadius.circular(Sizes.dimen_20), ), child: Image.network( widget.userAvatar, width: Sizes.dimen_40, height: Sizes.dimen_40, fit: BoxFit.cover, loadingBuilder: (BuildContext ctx, Widget child, ImageChunkEvent? loadingProgress) { if (loadingProgress == null) return child; return Center( child: CircularProgressIndicator( color: AppColors.burgundy, value: loadingProgress.expectedTotalBytes != null && loadingProgress.expectedTotalBytes != null ? loadingProgress.cumulativeBytesLoaded / loadingProgress.expectedTotalBytes! : null, ), ); }, errorBuilder: (context, object, stackTrace) { return const Icon( Icons.account_circle, size: 35, color: AppColors.greyColor, ); }, ), ) : Container( width: 35, ), ], ), isMessageSent(index) ? Container( margin: const EdgeInsets.only( right: Sizes.dimen_50, top: Sizes.dimen_6, bottom: Sizes.dimen_8), child: Text( DateFormat('dd MMM yyyy, hh:mm a').format( DateTime.fromMillisecondsSinceEpoch( int.parse(chatMessages.timestamp), ), ), style: const TextStyle( color: AppColors.lightGrey, fontSize: Sizes.dimen_12, fontStyle: FontStyle.italic), ), ) : const SizedBox.shrink(), ], ); } else { return Column( crossAxisAlignment: CrossAxisAlignment.start, children: [ Row( mainAxisAlignment: MainAxisAlignment.start, children: [ isMessageReceived(index) // left side (received message) ? Container( clipBehavior: Clip.hardEdge, decoration: BoxDecoration( borderRadius: BorderRadius.circular(Sizes.dimen_20), ), child: Image.network( widget.peerAvatar, width: Sizes.dimen_40, height: Sizes.dimen_40, fit: BoxFit.cover, loadingBuilder: (BuildContext ctx, Widget child, ImageChunkEvent? loadingProgress) { if (loadingProgress == null) return child; return Center( child: CircularProgressIndicator( color: AppColors.burgundy, value: loadingProgress.expectedTotalBytes != null && loadingProgress.expectedTotalBytes != null ? loadingProgress.cumulativeBytesLoaded / loadingProgress.expectedTotalBytes! : null, ), ); }, errorBuilder: (context, object, stackTrace) { return const Icon( Icons.account_circle, size: 35, color: AppColors.greyColor, ); }, ), ) : Container( width: 35, ), chatMessages.type == MessageType.text ? messageBubble( color: AppColors.burgundy, textColor: AppColors.white, chatContent: chatMessages.content, margin: const EdgeInsets.only(left: Sizes.dimen_10), ) : chatMessages.type == MessageType.image ? Container( margin: const EdgeInsets.only( left: Sizes.dimen_10, top: Sizes.dimen_10), child: chatImage( imageSrc: chatMessages.content, onTap: () {}), ) : const SizedBox.shrink(), ], ), isMessageReceived(index) ? Container( margin: const EdgeInsets.only( left: Sizes.dimen_50, top: Sizes.dimen_6, bottom: Sizes.dimen_8), child: Text( DateFormat('dd MMM yyyy, hh:mm a').format( DateTime.fromMillisecondsSinceEpoch( int.parse(chatMessages.timestamp), ), ), style: const TextStyle( color: AppColors.lightGrey, fontSize: Sizes.dimen_12, fontStyle: FontStyle.italic), ), ) : const SizedBox.shrink(), ], ); } } else { return const SizedBox.shrink(); } }
Sixth, we will create a view where all the text messages and images will be shown separately for sender and receiver.
Widget buildListMessage() { return Flexible( child: groupChatId.isNotEmpty ? StreamBuilder<QuerySnapshot>( stream: chatProvider.getChatMessage(groupChatId, _limit), builder: (BuildContext context, AsyncSnapshot<QuerySnapshot> snapshot) { if (snapshot.hasData) { listMessages = snapshot.data!.docs; if (listMessages.isNotEmpty) { return ListView.builder( padding: const EdgeInsets.all(10), itemCount: snapshot.data?.docs.length, reverse: true, controller: scrollController, itemBuilder: (context, index) => buildItem(index, snapshot.data?.docs[index])); } else { return const Center( child: Text('No messages...'), ); } } else { return const Center( child: CircularProgressIndicator( color: AppColors.burgundy, ), ); } }) : const Center( child: CircularProgressIndicator( color: AppColors.burgundy, ), ), ); } }
We have finished creating our chat application in Flutter with Firebase at its backend. There are still a lot of other Dart files and code involved in programming this application that I haven’t posted here in this article, but I have linked each page with GitHub links to view the complete code.
Conclusion
That is it! We are all done. Hope you enjoyed reading this as much as I did writing. I learned a lot when I created this application for the very first time. With FlutterFire and Dart CLI, things have become much easier to configure Flutter applications with Firebase services.
To further your learning with this application, you could configure it as a PWA. Here is a link to the PWA for this demo project, and a link to the whole project on GitHub for you to experiment.
The post How to build a chat application in Flutter with Firebase appeared first on LogRocket Blog.
This content was originally published here.
0 notes
Text
Key reasons to pick a flutter training course for beginners
Flutter is Google's UI toolkit with a single codebase. It is designed to craft user-friendly mobile, web, and desktop apps. To learn in detail about its benefits, enroll in a training center.

Expert trainers at professional institutes teach how to code by using Dart in the training classes. Now some may wonder what Dart is. Dart is a language used to develop applications in Flutter. Anybody can learn the applications of Flutter even if they have zero programming skills and knowledge.
Sole purpose of a flutter training course: The main objective of the flutter training course is to teach how to use it to develop high-quality, interactive mobile apps both for iOS and Android devices. With the help of Flutter, students can develop high-quality, interactive, and user-friendly mobile applications.
Anybody can learn Flutter with basic Computer knowledge: Even if a student is a newbie in development, he will enjoy the high-velocity development and quality apps that Flutter enables. But, the most important thing is to understand whether the course will help them establish a great career or not. Flutter training courses offered by top training centers combine personal instruction with the most updated course curriculum, project-based as well as providing hands-on learning. In addition, teachers at the training centers provide a wide spectrum of learning options like self-paced and live instructor-led classes.
Classes run in schedules: The trainees acquire the skills and expertise required to succeed in their careers during the course. The classes of the flutter training course run according to the schedules and at a pace that all students can follow. The course covers essential topics like Stateful widgets, build a list view, detail view, navigation in Flutter, gestures, and animations.
Course Contents At a glance:
Training course details cover the following topics-
Introduction to Dart language
About Flutter framework
Exploring basic Flutter widgets
Understanding stateful widgets
Navigation Concept
Handling User Input
Asynchronous programming
Working with the API
Model Class
Introduction to Firebase & Authentication
Firebase Firestore database
Working with Firestore database
State management using provider
Managing offline Data using Hive
Project Application of Basic Chat
The training course aims to deliver quality training to students. The mentors are industry experts and know how difficult it is to face challenges at the workplace, especially when you have to work on a live project and deliver it within the deadlines.
Certificate course of six months: The flutter training course runs for six months. In this six-month duration, teachers cover all fundamental knowledge on the core concepts with a practical approach. Such exposure for the students will act as a boon. In addition, the industry use-cases and the scenarios will help learners scale up their skills and perform at their best.
Mentors provide full support to students: At the end of the flutter training course, the students who complete it successfully are certified as Flutter developers. In addition, mentors train students with all kinds of knowledge essential for the course so that students can move ahead to take up challenges in their careers without hassle. Remember, learning Flutter will make you a certified and valuable developer. The reason is that with the help of this framework, you can develop apps that will work on both the leading platforms- Android and iOS.
Enroll in an ISO-certified training center: Hence it is advised to do the flutter training course from an ISO certified training center under industry-expert mentors. Learning from experienced mentors will always help you find the right career path.
Before we end: Some certified IT companies also provide courses on Flutter and then absorb the right candidate to work with them by giving them placement. So, what next? Visit the best training center today and take admission to the flutter training course.
0 notes
Text
Simple Steps to Build Chat App In Flutter With Firebase
Many companies build Flutter chat apps without firebase, which are less functional and sometimes lack compatibility. But with the firebase module, you develop a highly scalable and performing app for the client. So, here are quick steps:
1. Firebase Authentication
The very initial and vital step is to create an authentic sign-up to protect the chat app from any disguise. Now comes the understanding part. If the developer uses the Google Sign-up concept, a developer can use terminal/CMD or VS code.
These will work as the systematic code editor and offer great support for development functions like debugging task running and version control. Now create a sign-in widget in the Sign-in. Dart, and here you will utilize the framework, appBar, body, and floating buttons.
2. Installing Widgets For Functionality
Concerning the Flutter chat room, it is essential to properly coordinate among the plugins to run it flawlessly. By arranging the plugins properly, the developer can create and assemble a main Firebase chat application.
To install any plugin on the app, you need to follow the guidelines of incorporating “Firebaseauth, google sign in, cloud firestore, firebase storage, etc., to the app with firebase. Sometimes you might face problems installing the plugins; here, a flutter chat app developer will give you precisely.
Which Are The Suitable Plugins for Flutter Firebase Chat App Development?
Firebase auth for flutter
Google Sign-in
Cloud firebase plugin in a flutter
Image picker to choose images from the gallery
Fluttertoast to display a toast
Firebase cloud storage for flutter
3. Layout of the Screen
The next task is to prepare a layout of the app screen. In a chat application, different screens are available. It holds an enlistment screen, login screen, setting screen, landing page, and chat screen.
This load of the screen is built by creating several arrangements of codes. It is the only reason why the developer has to follow the guidelines properly. There are four prominent types of screen layout, i.e., Login screen layout, Main screen layout, Setting screen layout, Chat screen layout.
4. Connection with Flutter & Firebase
Another essential part of the flutter chat app development is to connect it with firebase. A developer has to sign up with a Google account or Sign in to the firebase to do so. Now, you have to create a project and then construct Project Overview.
In this segment, you have to add your Package Name. Download google-services.json and move the downloaded file in the Android app module root directory. Now add the google-services dependencies in the Project-level build. Gradle and you are good to go.
So these were the four significant steps to build a chat app with flutter. Now we will look at the benefits of developing a chat app in a flutter with firebase.
Blog Source: https://dreamsoft4u.com/blog/how-to-develop-a-chat-app-in-flutter-using-firebase
#Firebase chat application#flutter app development companies#\#developing chat apps in a flutter with firebase#chat app development
0 notes
Photo

Download Flutter dating app with Firebase AdMob and RevenueCat on Codecanyon
Description Flutter dating app with Firebase AdMob and RevenueCat :
Download Flutter dating app with Firebase AdMob and RevenueCat. The theme releases on Wednesday third March 2021 By The author Matthuffy on Codecanyon. It’s makes use of with admob,android,chat,dart,dating app,Dating app with Subscription,firebase,flutter,flutter ui,Hinge clone,in app purchases,match,monetise flutter,revenuecat,tinder clone. Item Title: Flutter dating app with Firebase AdMob and RevenueCat Category: cellular/flutter Price: $37 Author: Matthuffy Published Date: Wednesday third March 2021 04:19:07 PM More Info / DownloadDemo <!-The Title->
Flutter dating app utilizing FireBase
<!-The Initial textual content->
This is a Flutter dating software which makes use of Google FireBase Google Storage and Cloud Firestore which provides a versatile scalable database for cellular purposes.
Earn income from Memberships and additionally AdMob promoting between profile searches
Features
IOS and Android suitable
Admob income
RevenueCat
Premium Membership (Unlimited Likes / matches)
Chat
Anonymous Match ranking and critiques
Ability to pick out the space to seek for a match
Match preferences
Match Alerts with Firebase messaging
Photo administration
Profile quotes
Dark and Light Modes
Monile quantity registration & verification
Similar to Hinge however higher!!!
<!-Image advert->
Download Android Preview
A working preview on Google play is avoilable to check with
More Info / DownloadDemo #Flutter #dating #app #Firebase #AdMob #RevenueCat
#admob#All_Code_amp_plugin#android#chat#Code_amp_plugin_Rising_stars#dart#dating_app#Dating_app_with_Subscription#firebase#flutter#flutter_ui#Hinge_clone#in-app_purchases#match#mobile#mobile_Rising_stars#monetise_flutter#revenuecat#Rising_stars#tinder_clone
0 notes
Text
Thanks for tagging me, @itspillowtime! Now I have a reason to take a break from acads for a while xD
Last song: What is Love by Twice (Any Onces here???)
Last movie: I think it's Tangled??? Watched it with my nephew 😍
Currently watching: Build Flutter Chat App with Firebase Auth and Firestore part 2 (Any app devs here? Let's be friends! XD)
Currently reading: The errors that are displayed in my IDE 😭 I'm tired of seeing red texts LOL
I don't have anyone in mind to tag, but if you see this and like to try it, feel free to reblog!
Thank you for tagging me! @peakatseven
Last song: birthday suit by kesha cause it’s one of top serotonin fun songs
Last movie: Wonder Woman 1984 I think which for the record was actually really fun and good and not terrible like everyone says
Currently watching: Drag Race UK, idk why but I always love the British version of all reality shows then the American ones
Currently reading: the girls I’ve been by Tess sharpe which so far is super great!
Tagging @slowmotiondoublevision @lover-chelsea @nifty-swifty if y’all want!
58 notes
·
View notes
Text
Unknown Facts About Flutter App Development & Essential Technologies
Flutter has taken the app development world by unique way but there are many counter-known facts about its ecosystem that can enhance your projects. From Dart technologies to GraphQL, state management, and payment gateways, let’s enter into some unknown truth insights that can streamline your development process.

1. Flutter & Dart – The Speed Secret
Dart’s Just-in-Time (JIT) and Ahead-of-Time (AOT) compilation offer fast development and high-performance execution.
Unlike JavaScript, Dart reduces garbage collection pauses, ensuring a smoother user experience.
Flutter doesn’t use OEM widgets; instead, it renders UI directly using Skia, making animations feel seamless.
Unknown Fact:
Dart has a feature called Isolates, which allows parallel execution without threads. This helps prevent UI lag in complex apps.
2. GraphQL – A Smarter Alternative to REST
Unlike RESTful APIs, GraphQL enables precise data fetching, reducing network calls.
It eliminates over-fetching and under-fetching, leading to faster app performance.
GraphQL is strongly typed, reducing unexpected runtime errors.
Unknown Fact:
GraphQL allows real-time updates via subscriptions, making it perfect for chat apps, stock trading, and collaborative tools.
3. State Management – GetX vs. Provider
GetX is lightweight, reactive, and doesn’t require a Build Context.
Provider is recommended by Google and is ideal for large-scale applications.
GetX offers an in-built dependency injection system, simplifying API calls.
Unknown Fact:
GetX has a persistent storage feature, allowing data retention even after app restarts without using Shared Preferences or local databases.
4. RESTful APIs – The Silent Backbone
REST APIs enable seamless communication between Flutter apps and servers.
Proper API versioning ensures backward compatibility.
Caching REST API responses can significantly improve app performance.
Unknown Fact:

Many developers overlook the use of HTTP/2, which reduces latency and improves performance by handling multiple requests in a single connection.
5. UI/UX – More Than Just Good Looks
Micro-animations enhance user experience and engagement.
Dark Mode & Adaptive UI boost accessibility and battery life.
Material Design & Cupertino widgets allow cross-platform consistency.
Unknown Fact:
Google’s Flutter team suggests using Motion Guidelines to create natural-looking animations that mimic real-world physics.
6. Firebase – More Than Just Authentication
Firestore enables real-time sync and offline support.
Firebase ML can integrate AI features like image recognition.
Firebase App Distribution helps in easy beta testing.
Unknown Fact:
Firebase has a hidden feature called Firebase Extensions, which can automate background tasks like image resizing, translations, and scheduled messaging.
7. Payment Gateways – Secure & Seamless
Stripe & Razorpay provide easy integration with Flutter.
Apple Pay & Google Pay SDKs ensure a frictionless checkout experience.
PCI DSS compliance is essential to handle transactions securely.
Unknown Fact:
Using tokenization instead of storing credit card details can prevent fraud and reduce compliance requirements.
8. Third-Party APIs – Extending Functionality
Google Maps API for location services.
Twilio API for SMS & phone verification.
Algolia API for lightning-fast search capabilities.
Unknown Fact:
Some APIs provide rate-limited free tiers, which can be optimized using request batching and caching mechanisms.
9. Streamlining Backend Operations
CI/CD pipelines (GitHub Actions, Codemagic) speed up deployments.
GraphQL & REST hybrid APIs can optimize backend load.
Serverless functions reduce the need for dedicated backend infrastructure.
Unknown Fact:

Using Redis or Memcached can dramatically improve response times by caching frequent database queries.
One Last Looks:
Flutter development goes beyond just UI design. By leveraging Dart’s Isolates, GraphQL’s real-time capabilities, GetX’s persistence, and Firebase’s automation, developers can build high-performance applications with minimal effort and maximum efficiency. Integrating smart API strategies, payment gateways, and backend optimizations can take your app to the next level.
Are you ready to implement these lesser-known strategies in your next Flutter app?
#hire flutter developers#flutter application development#cloneappdevelopment#mobile app development#software development#flutter app development#customappdevelopment#custom mobile app development company
0 notes
Text
Unknown Facts About Flutter App Development & Essential Technologies
Flutter has taken the app development world by unique way but there are many counter-known facts about its ecosystem that can enhance your projects. From Dart technologies to GraphQL, state management, and payment gateways, let’s enter into some unknown truth insights that can streamline your development process.

1. Flutter & Dart – The Speed Secret
Dart’s Just-in-Time (JIT) and Ahead-of-Time (AOT) compilation offer fast development and high-performance execution.
Unlike JavaScript, Dart reduces garbage collection pauses, ensuring a smoother user experience.
Flutter doesn’t use OEM widgets; instead, it renders UI directly using Skia, making animations feel seamless.
Unknown Fact:
Dart has a feature called Isolates, which allows parallel execution without threads. This helps prevent UI lag in complex apps.
2. GraphQL – A Smarter Alternative to REST
Unlike RESTful APIs, GraphQL enables precise data fetching, reducing network calls.
It eliminates over-fetching and under-fetching, leading to faster app performance.
GraphQL is strongly typed, reducing unexpected runtime errors.
Unknown Fact:
GraphQL allows real-time updates via subscriptions, making it perfect for chat apps, stock trading, and collaborative tools.
3. State Management – GetX vs. Provider
GetX is lightweight, reactive, and doesn’t require a Build Context.
Provider is recommended by Google and is ideal for large-scale applications.
GetX offers an in-built dependency injection system, simplifying API calls.
Unknown Fact:
GetX has a persistent storage feature, allowing data retention even after app restarts without using Shared Preferences or local databases.
4. RESTful APIs – The Silent Backbone
REST APIs enable seamless communication between Flutter apps and servers.
Proper API versioning ensures backward compatibility.
Caching REST API responses can significantly improve app performance.
Unknown Fact:

Many developers overlook the use of HTTP/2, which reduces latency and improves performance by handling multiple requests in a single connection.
5. UI/UX – More Than Just Good Looks
Micro-animations enhance user experience and engagement.
Dark Mode & Adaptive UI boost accessibility and battery life.
Material Design & Cupertino widgets allow cross-platform consistency.
Unknown Fact:
Google’s Flutter team suggests using Motion Guidelines to create natural-looking animations that mimic real-world physics.
6. Firebase – More Than Just Authentication
Firestore enables real-time sync and offline support.
Firebase ML can integrate AI features like image recognition.
Firebase App Distribution helps in easy beta testing.
Unknown Fact:
Firebase has a hidden feature called Firebase Extensions, which can automate background tasks like image resizing, translations, and scheduled messaging.
7. Payment Gateways – Secure & Seamless
Stripe & Razorpay provide easy integration with Flutter.
Apple Pay & Google Pay SDKs ensure a frictionless checkout experience.
PCI DSS compliance is essential to handle transactions securely.
Unknown Fact:
Using tokenization instead of storing credit card details can prevent fraud and reduce compliance requirements.
8. Third-Party APIs – Extending Functionality
Google Maps API for location services.
Twilio API for SMS & phone verification.
Algolia API for lightning-fast search capabilities.
Unknown Fact:
Some APIs provide rate-limited free tiers, which can be optimized using request batching and caching mechanisms.
9. Streamlining Backend Operations
CI/CD pipelines (GitHub Actions, Codemagic) speed up deployments.
GraphQL & REST hybrid APIs can optimize backend load.
Serverless functions reduce the need for dedicated backend infrastructure.
Unknown Fact:

Using Redis or Memcached can dramatically improve response times by caching frequent database queries.
One Last Looks:
Flutter development goes beyond just UI design. By leveraging Dart’s Isolates, GraphQL’s real-time capabilities, GetX’s persistence, and Firebase’s automation, developers can build high-performance applications with minimal effort and maximum efficiency. Integrating smart API strategies, payment gateways, and backend optimizations can take your app to the next level.
Are you ready to implement these lesser-known strategies in your next Flutter app?
#rest api#mobile app development#software development#cloneappdevelopment#custom mobile app development company#flutter app developers#flutter application development#flutter app development#customappdevelopment#aiappdevelopmentcompany
0 notes
Text
Unknown Facts About Flutter App Development & Essential Technologies
Flutter has taken the app development world by unique way but there are many counter-known facts about its ecosystem that can enhance your projects. From Dart technologies to GraphQL, state management, and payment gateways, let’s enter into some unknown truth insights that can streamline your development process.

1. Flutter & Dart – The Speed Secret
Dart’s Just-in-Time (JIT) and Ahead-of-Time (AOT) compilation offer fast development and high-performance execution.
Unlike JavaScript, Dart reduces garbage collection pauses, ensuring a smoother user experience.
Flutter doesn’t use OEM widgets; instead, it renders UI directly using Skia, making animations feel seamless.
Unknown Fact:
Dart has a feature called Isolates, which allows parallel execution without threads. This helps prevent UI lag in complex apps.
2. GraphQL – A Smarter Alternative to REST
Unlike RESTful APIs, GraphQL enables precise data fetching, reducing network calls.
It eliminates over-fetching and under-fetching, leading to faster app performance.
GraphQL is strongly typed, reducing unexpected runtime errors.
Unknown Fact:
GraphQL allows real-time updates via subscriptions, making it perfect for chat apps, stock trading, and collaborative tools.
3. State Management – GetX vs. Provider
GetX is lightweight, reactive, and doesn’t require a Build Context.
Provider is recommended by Google and is ideal for large-scale applications.
GetX offers an in-built dependency injection system, simplifying API calls.
Unknown Fact:
GetX has a persistent storage feature, allowing data retention even after app restarts without using Shared Preferences or local databases.
4. RESTful APIs – The Silent Backbone
REST APIs enable seamless communication between Flutter apps and servers.
Proper API versioning ensures backward compatibility.
Caching REST API responses can significantly improve app performance.
Unknown Fact:

Many developers overlook the use of HTTP/2, which reduces latency and improves performance by handling multiple requests in a single connection.
5. UI/UX – More Than Just Good Looks
Micro-animations enhance user experience and engagement.
Dark Mode & Adaptive UI boost accessibility and battery life.
Material Design & Cupertino widgets allow cross-platform consistency.
Unknown Fact:
Google’s Flutter team suggests using Motion Guidelines to create natural-looking animations that mimic real-world physics.
6. Firebase – More Than Just Authentication
Firestore enables real-time sync and offline support.
Firebase ML can integrate AI features like image recognition.
Firebase App Distribution helps in easy beta testing.
Unknown Fact:
Firebase has a hidden feature called Firebase Extensions, which can automate background tasks like image resizing, translations, and scheduled messaging.
7. Payment Gateways – Secure & Seamless
Stripe & Razorpay provide easy integration with Flutter.
Apple Pay & Google Pay SDKs ensure a frictionless checkout experience.
PCI DSS compliance is essential to handle transactions securely.
Unknown Fact:
Using tokenization instead of storing credit card details can prevent fraud and reduce compliance requirements.
8. Third-Party APIs – Extending Functionality
Google Maps API for location services.
Twilio API for SMS & phone verification.
Algolia API for lightning-fast search capabilities.
Unknown Fact:

Some APIs provide rate-limited free tiers, which can be optimized using request batching and caching mechanisms.
9. Streamlining Backend Operations
CI/CD pipelines (GitHub Actions, Codemagic) speed up deployments.
GraphQL & REST hybrid APIs can optimize backend load.
Serverless functions reduce the need for dedicated backend infrastructure.
Unknown Fact:
Using Redis or Memcached can dramatically improve response times by caching frequent database queries.
One Last Looks:
Flutter development goes beyond just UI design. By leveraging Dart’s Isolates, GraphQL’s real-time capabilities, GetX’s persistence, and Firebase’s automation, developers can build high-performance applications with minimal effort and maximum efficiency. Integrating smart API strategies, payment gateways, and backend optimizations can take your app to the next level.
Are you ready to implement these lesser-known strategies in your next Flutter app?
#graphql#custom mobile app development company#flutter app developers#flutter application development#flutter app development#cloneappdevelopment#software development#aiappdevelopmentcompany
0 notes
Text
Unknown Facts About Flutter App Development & Essential Technologies
Flutter has taken the app development world by unique way but there are many counter-known facts about its ecosystem that can enhance your projects. From Dart technologies to GraphQL, state management, and payment gateways, let’s enter into some unknown truth insights that can streamline your development process.

1. Flutter & Dart – The Speed Secret
Dart’s Just-in-Time (JIT) and Ahead-of-Time (AOT) compilation offer fast development and high-performance execution.
Unlike JavaScript, Dart reduces garbage collection pauses, ensuring a smoother user experience.
Flutter doesn’t use OEM widgets; instead, it renders UI directly using Skia, making animations feel seamless.
Unknown Fact:
Dart has a feature called Isolates, which allows parallel execution without threads. This helps prevent UI lag in complex apps.
2. GraphQL – A Smarter Alternative to REST
Unlike RESTful APIs, GraphQL enables precise data fetching, reducing network calls.
It eliminates over-fetching and under-fetching, leading to faster app performance.
GraphQL is strongly typed, reducing unexpected runtime errors.
Unknown Fact:
GraphQL allows real-time updates via subscriptions, making it perfect for chat apps, stock trading, and collaborative tools.
3. State Management – GetX vs. Provider
GetX is lightweight, reactive, and doesn’t require a Build Context.
Provider is recommended by Google and is ideal for large-scale applications.
GetX offers an in-built dependency injection system, simplifying API calls.
Unknown Fact:
GetX has a persistent storage feature, allowing data retention even after app restarts without using Shared Preferences or local databases.
4. RESTful APIs – The Silent Backbone
REST APIs enable seamless communication between Flutter apps and servers.
Proper API versioning ensures backward compatibility.
Caching REST API responses can significantly improve app performance.
Unknown Fact:

Many developers overlook the use of HTTP/2, which reduces latency and improves performance by handling multiple requests in a single connection.
5. UI/UX – More Than Just Good Looks
Micro-animations enhance user experience and engagement.
Dark Mode & Adaptive UI boost accessibility and battery life.
Material Design & Cupertino widgets allow cross-platform consistency.
Unknown Fact:
Google’s Flutter team suggests using Motion Guidelines to create natural-looking animations that mimic real-world physics.
6. Firebase – More Than Just Authentication
Firestore enables real-time sync and offline support.
Firebase ML can integrate AI features like image recognition.
Firebase App Distribution helps in easy beta testing.
Unknown Fact:
Firebase has a hidden feature called Firebase Extensions, which can automate background tasks like image resizing, translations, and scheduled messaging.
7. Payment Gateways – Secure & Seamless
Stripe & Razorpay provide easy integration with Flutter.
Apple Pay & Google Pay SDKs ensure a frictionless checkout experience.
PCI DSS compliance is essential to handle transactions securely.
Unknown Fact:
Using tokenization instead of storing credit card details can prevent fraud and reduce compliance requirements.
8. Third-Party APIs – Extending Functionality
Google Maps API for location services.
Twilio API for SMS & phone verification.
Algolia API for lightning-fast search capabilities.
Unknown Fact:
Some APIs provide rate-limited free tiers, which can be optimized using request batching and caching mechanisms.
9. Streamlining Backend Operations
CI/CD pipelines (GitHub Actions, Codemagic) speed up deployments.
GraphQL & REST hybrid APIs can optimize backend load.
Serverless functions reduce the need for dedicated backend infrastructure.
Unknown Fact:

Using Redis or Memcached can dramatically improve response times by caching frequent database queries.
One Last Looks:
Flutter development goes beyond just UI design. By leveraging Dart’s Isolates, GraphQL’s real-time capabilities, GetX’s persistence, and Firebase’s automation, developers can build high-performance applications with minimal effort and maximum efficiency. Integrating smart API strategies, payment gateways, and backend optimizations can take your app to the next level.
Are you ready to implement these lesser-known strategies in your next Flutter app?
#BackendDevelopment#custom mobile app development company#mobile app development#flutter app developers#flutter application development#flutter app development#customappdevelopment#software development#cloneappdevelopment
0 notes